Muddy Buddy Rice Krispies Recipe
Introduction
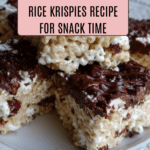
Muddy Buddy Rice Krispies are a delightful twist on the classic treat, combining the crunchy texture of cereal with rich chocolate and peanut butter. This easy no-bake snack is perfect for satisfying sweet cravings or sharing with friends and family.

Ingredients
- 6 cups Rice Krispies cereal
- 1 cup chocolate chips
- 1/2 cup peanut butter
- 1 1/2 cups powdered sugar
Instructions
- Step 1: In a microwave-safe bowl, melt the chocolate chips and peanut butter together in 30-second intervals, stirring in between until smooth and fully combined.
- Step 2: Pour the melted mixture over the Rice Krispies cereal and gently stir until all the cereal is evenly coated.
- Step 3: Transfer the coated cereal to a large bowl containing the powdered sugar. Toss gently but thoroughly to coat each piece.
- Step 4: Spread the mixture out on wax paper or a baking sheet to cool and set before serving.
Tips & Variations
- For extra crunch, add chopped nuts or pretzels to the mixture before coating with powdered sugar.
- Use white chocolate chips instead of regular chocolate for a sweeter, creamier flavor.
- To make this recipe nut-free, substitute peanut butter with sunflower seed butter.
Storage
Store Muddy Buddy Rice Krispies in an airtight container at room temperature for up to one week. To keep them fresh longer, refrigerate and allow to come to room temperature before serving. Avoid storing in humid areas to maintain crispiness.
How to Serve
Serve this delicious recipe with your favorite sides.
FAQs
Can I use a different cereal instead of Rice Krispies?
Yes, you can substitute with similar puffed rice or corn cereals, but the texture and taste of the final treat may vary slightly.
Do I have to use powdered sugar for coating?
Powdered sugar gives the classic Muddy Buddy sweetness and dusted appearance, but you can also try cocoa powder or a mix of powdered sugar and cinnamon for a different flavor.
PrintMuddy Buddy Rice Krispies Recipe
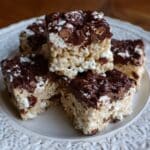
Muddy Buddy Rice Krispies is a delicious twist on the classic Rice Krispies treat, combining the crunch of cereal with a rich mixture of melted chocolate and peanut butter, all generously coated in powdered sugar for a sweet, melt-in-your-mouth finish. This no-bake snack is perfect for parties, quick treats, or anytime you crave a nostalgic but elevated dessert.
- Prep Time: 10 minutes
- Cook Time: 0 minutes
- Total Time: 10 minutes
- Yield: Approximately 8 servings 1x
- Category: Snack
- Method: No-Cook
- Cuisine: American
Ingredients
Ingredients
- 6 cups Rice Krispies cereal
- 1 cup semisweet chocolate chips
- 1 cup creamy peanut butter
- 1 ½ cups powdered sugar
Instructions
- Melt Chocolate and Peanut Butter: In a microwave-safe bowl, combine the chocolate chips and peanut butter. Microwave in 30-second intervals, stirring after each, until the mixture is completely smooth and well combined.
- Mix with Cereal: Place the Rice Krispies cereal in a large mixing bowl. Pour the melted chocolate and peanut butter mixture over the cereal and gently fold to coat every piece evenly without crushing the cereal.
- Coat with Powdered Sugar: Transfer the coated cereal mixture into a large resealable plastic bag or separate mixing bowl. Add the powdered sugar, seal the bag, or hold the bowl with a lid, and shake or stir vigorously to thoroughly coat the cereal mixture with powdered sugar.
Notes
- Use a large bowl or bag to ensure the powdered sugar evenly coats the mixture without making a mess.
- For a different flavor, try using white chocolate chips or adding a pinch of salt to balance the sweetness.
- Store the Muddy Buddy Rice Krispies in an airtight container at room temperature for up to 3 days for optimal freshness.
Keywords: Muddy Buddy, Rice Krispies, Peanut Butter, Chocolate, No-Bake Snack, Sweet Treat