Red Velvet Cheesecake Bites Recipe
Introduction
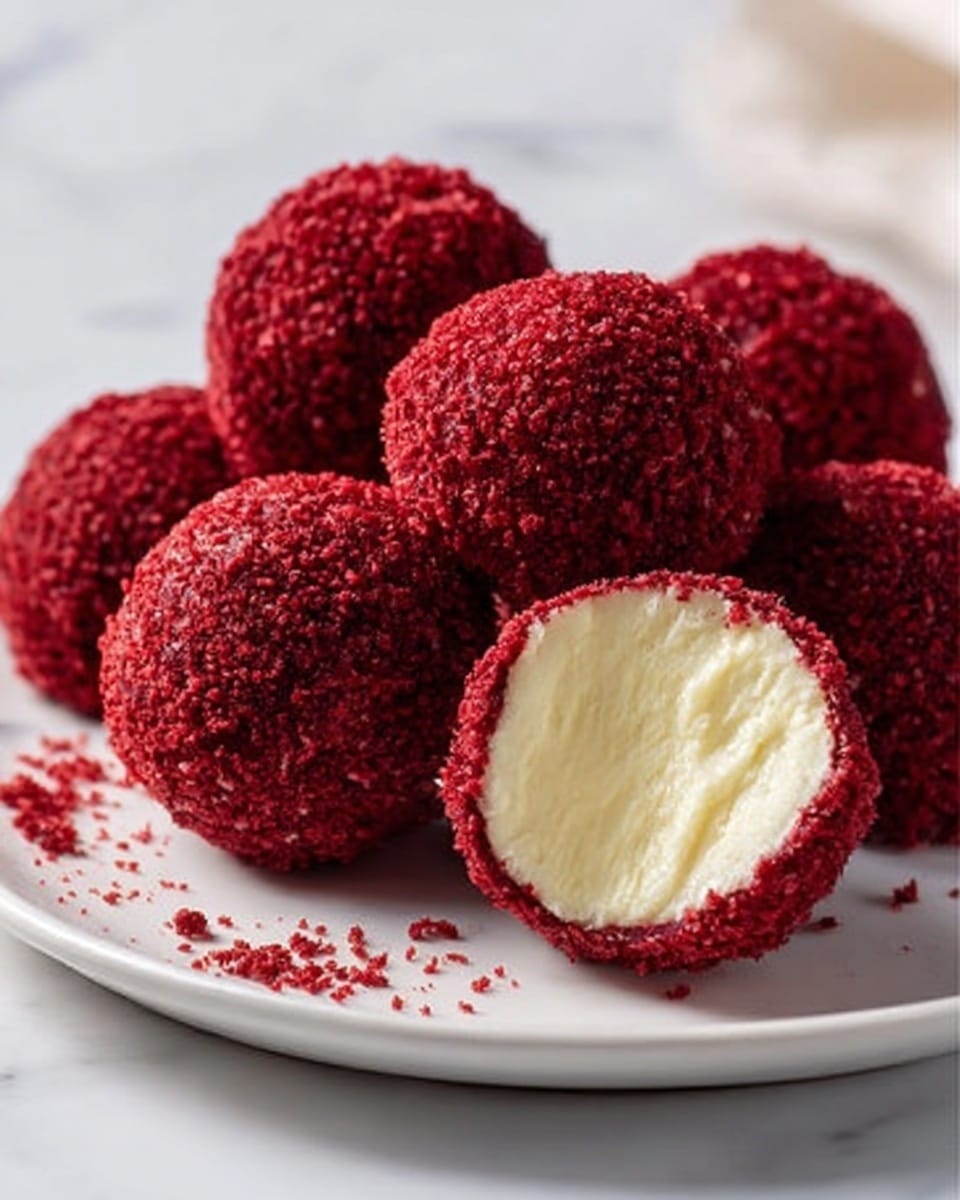
Red Velvet Cheesecake Bites combine the rich, creamy texture of cheesecake with the vibrant flavor of red velvet cake. These bite-sized treats are perfect for parties or a sweet snack anytime you crave something special and indulgent.
Ingredients
- 1 box red velvet cake mix
- Ingredients listed on the cake mix packaging (e.g., eggs, oil, water)
- 16 ounces cream cheese, room temperature
- 4 tablespoons butter, room temperature
- 1/2 cup powdered sugar
- 2 cups graham crackers, crushed
- 1 teaspoon vanilla extract
Instructions
- Step 1: Preheat the oven to 350°F (175°C) and line or grease two 8-inch cake pans.
- Step 2: Prepare the red velvet cake according to the package directions. Bake the cake and let it cool completely.
- Step 3: Once cooled, crumble the cake with your hands until it resembles coarse sand. If it feels too moist, break it into small pieces and spread on a lined baking sheet. Dry it in the oven at 350°F for 5–6 minutes.
- Step 4: In a large bowl, combine the cream cheese, butter, and powdered sugar. Beat with an electric mixer until fluffy and aerated.
- Step 5: Place graham crackers in a ziplock bag and crush them into a fine powder using a rolling pin. Add the crushed crackers and vanilla extract to the cream cheese mixture and mix until fully combined.
- Step 6: Using a 2 teaspoon cookie scoop, form cream cheese balls. Roll them between your hands until smooth and place them on a lined baking sheet or large plate. Refrigerate for 1 hour to firm up.
- Step 7: After chilling, roll each cream cheese ball in the red velvet cake crumbs, covering all sides. Use your hands to shape the bites into smooth rounds if needed.
- Step 8: Serve immediately or refrigerate until ready to enjoy.
- Step 9: If you try this recipe, feel free to share your experience in the comments or star ratings.
Tips & Variations
- If the red velvet crumbs are too moist, drying them slightly in the oven helps them stick better to the cheesecake balls.
- You can substitute graham cracker crumbs with digestive biscuits or cookies for a different flavor.
- Adding a pinch of cinnamon or a dash of espresso powder to the cream cheese mixture can enhance the flavor depth.
- For a festive touch, drizzle melted white chocolate over the coated bites before chilling.
Storage
Store the cheesecake bites in an airtight container in the refrigerator for up to 5 days. To reheat, simply let them come to room temperature for 10–15 minutes before serving for the best texture and flavor.
How to Serve
Serve this delicious recipe with your favorite sides.
FAQs
Can I use homemade red velvet cake instead of the cake mix?
Yes, homemade red velvet cake works great. Just make sure it’s fully cooled and crumbly for coating the cheesecake bites.
Can I freeze these cheesecake bites?
Yes, you can freeze them in a single layer on a baking sheet, then transfer to a freezer-safe container. Thaw in the refrigerator before serving for best results.
PrintRed Velvet Cheesecake Bites Recipe

These Red Velvet Cheesecake Bites combine the classic flavors of moist red velvet cake with a creamy cheesecake center, rolled in a crunchy graham cracker coating for a delightful bite-sized dessert perfect for parties or special occasions.
- Prep Time: 20 minutes
- Cook Time: 30 minutes
- Total Time: 1 hour 50 minutes
- Yield: About 24 bites 1x
- Category: Dessert
- Method: Baking
- Cuisine: American
Ingredients
Red Velvet Cake
- 1 box red velvet cake mix
- Ingredients required as per cake mix packaging (usually eggs, oil, water)
Cheesecake Mixture
- 16 ounces cream cheese, room temperature
- 4 tablespoons butter, room temperature
- 1/2 cup powdered sugar
- 1 teaspoon vanilla extract
Coating
- 2 cups graham crackers, crushed
Instructions
- Preheat and Prepare Pans: Preheat your oven to 350°F (175°C) and grease or line two 8-inch cake pans to prepare for baking the red velvet cake.
- Bake the Cake: Prepare the red velvet cake batter according to the instructions on the cake mix packaging, bake in the prepared pans, then let the cakes cool completely.
- Crumble the Cake: Once cooled, crumble the cake with your hands into coarse crumbs. If the crumbs are too moist, spread them on a lined baking sheet and dry them in the oven at 350°F for 5-6 minutes to firm up.
- Make the Cheesecake Filling: In a large bowl, beat the cream cheese, butter, and powdered sugar together with an electric mixer until fluffy and aerated.
- Add Flavor and Texture: Crush the graham crackers into fine powder using a rolling pin inside a ziplock bag, then add the crumbs and vanilla extract to the cream cheese mixture. Mix until fully combined.
- Form Cheesecake Balls: Scoop the mixture with a 2 teaspoon cookie scoop, roll balls with your hands until smooth and round, then place them on a lined baking sheet or plate. Refrigerate for 1 hour to firm up.
- Coat with Red Velvet Crumbs: Roll the chilled cheesecake balls in the red velvet cake crumbs, ensuring they are fully coated on all sides. Reshape as needed for smooth, round bites.
- Serve and Store: Enjoy these bites immediately or store them in the refrigerator until ready to serve.
- Share Your Experience: If you try this recipe, leave a comment or rating to share your feedback.
Notes
- If the cake crumbs are too moist, drying them in the oven will help them adhere better to the cheesecake balls.
- You can substitute crushed vanilla wafers for graham crackers if desired.
- Make sure the cream cheese and butter are at room temperature for easier mixing.
- Store cheesecake bites in an airtight container in the refrigerator for up to 3 days.
Keywords: red velvet cheesecake bites, cheesecake balls, red velvet dessert, bite-sized desserts, creamy cheesecake, graham cracker coating